Introduction
This guide explains how to operate a compact espresso machine safely from an RV power inverter. One will learn how to calculate power requirements, select the appropriate converter, install the equipment, and avoid common electrical hazards. The information is valuable for travelers who desire barista‑grade coffee without sacrificing battery life or safety. By following these steps, one can enjoy a reliable espresso experience on the road.
What You’ll Need
- Suplife 55 Amp RV Power Converter – 950 W, 55 A, 5‑year warranty.
- Breville Bambino – 54 mm portafilter, automatic steam wand, $299.95, 4/5 rating.
- Atatix Espresso Machine – 20‑bar pump, NTC temperature control, $90.64, 4.3/5 rating.
- 12 V lead‑acid battery with sufficient amp‑hour capacity.
- Heavy‑gauge extension cables and IEC power cord.
- Multimeter, wire strippers, and basic hand tools.
Step 1: Assess Power Requirements
Begin by reviewing the electrical specifications of the espresso machine you intend to use. The Breville Bambino draws approximately 1,200 W during heating, while the Atatix Espresso Machine requires around 950 W for brewing and steaming. Add a 20 % safety margin to accommodate start‑up surges; therefore, the converter should be rated for at least 1,500 W. The Suplife 55 Amp RV Power Converter provides 950 W continuous output, which is sufficient for the Atatix model but marginal for the Breville. Choose the machine that matches the converter capacity, or consider a higher‑capacity inverter if the Breville is preferred.
Step 2: Choose an Appropriate Inverter
Select a pure‑sine‑wave inverter that can deliver the required wattage without distortion. Pure‑sine wave output protects sensitive electronics such as temperature sensors and pump motors. Verify that the inverter’s continuous rating exceeds the espresso machine’s peak demand by at least 25 %. For the Atatix, a 1,200 W inverter is adequate; for the Breville, a 1,800 W inverter is recommended. Ensure the inverter includes overload protection, low‑voltage shutdown, and short‑circuit protection to safeguard the RV’s battery bank.
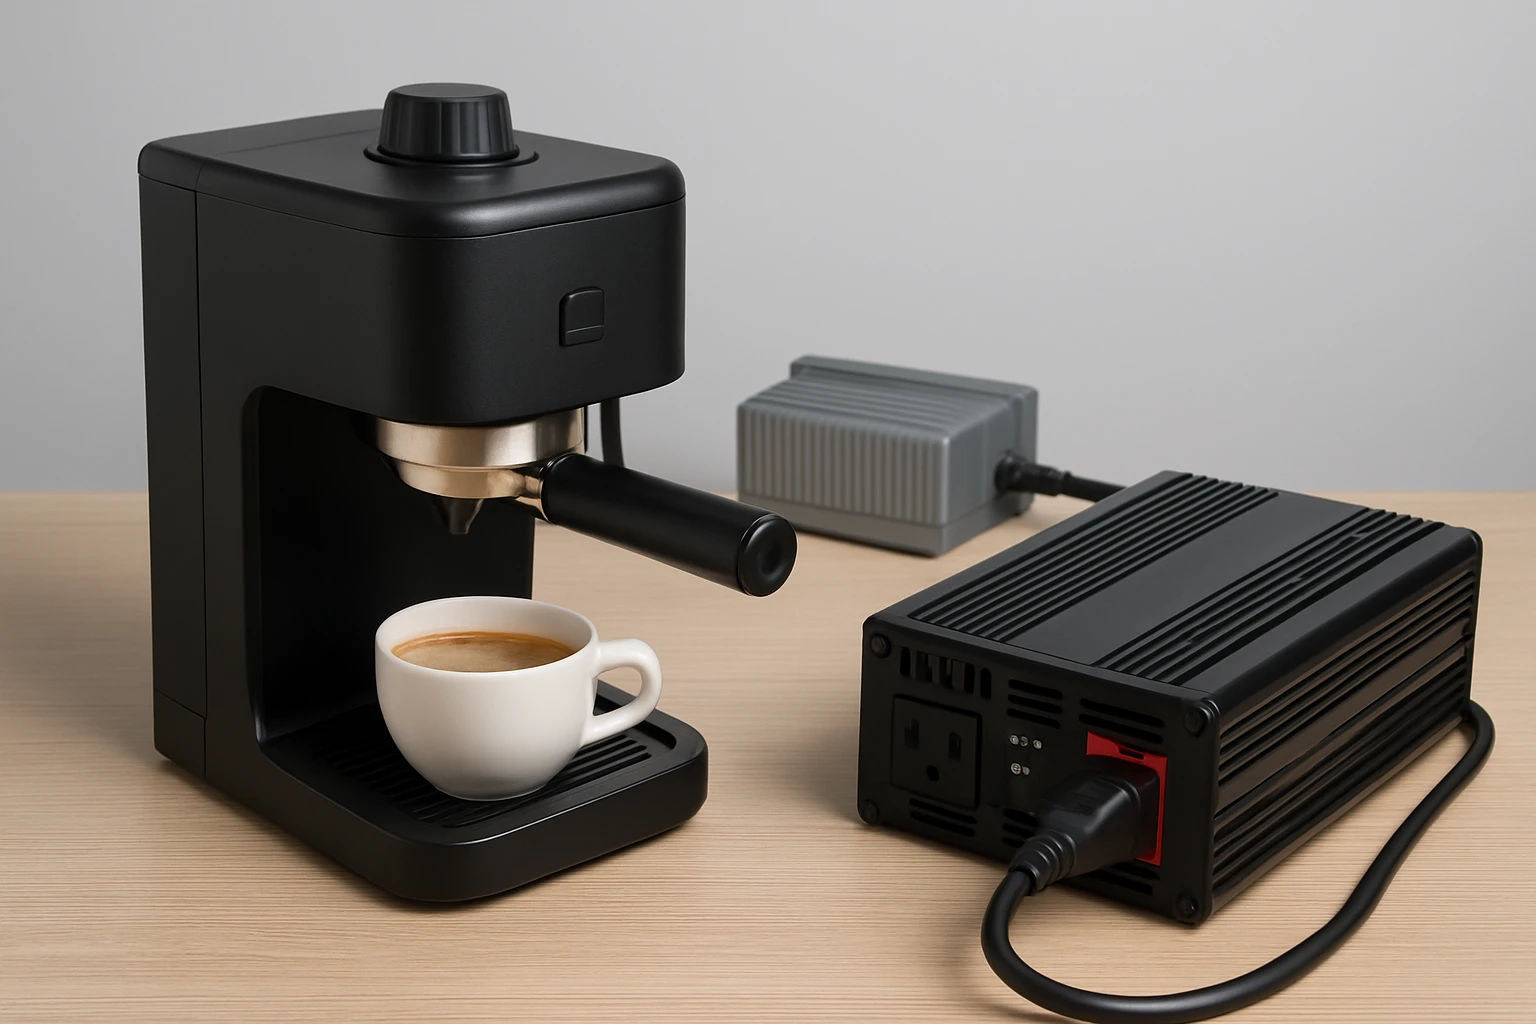
Step 3: Install the Power Converter
Mount the Suplife 55 Amp RV Power Converter in a well‑ventilated compartment near the battery. The converter features a silent copper fan that reduces noise by 30 %, making it suitable for confined RV spaces. Connect the input leads to the 12 V battery terminals, observing proper polarity and using a fuse rated slightly above the converter’s maximum current (60 A). Secure the grounding strap to the RV chassis to prevent stray currents. Finally, attach the output IEC socket to the converter, ensuring the cable gauge matches the 13.6 VDC output specifications.
Step 4: Connect the Espresso Machine
Run a heavy‑gauge IEC extension cord from the converter’s output socket to the espresso machine’s power cord. For the Atatix Espresso Machine, the 44 oz removable water tank simplifies placement on the RV countertop. Plug the machine into the converter and verify that the indicator lights illuminate. Allow the machine to complete its pre‑heat cycle; the Atatix reaches brewing temperature in approximately 30 seconds thanks to its NTC precision temperature control. For the Breville, the thermojet heating system achieves optimal extraction temperature in three seconds, but only if the power source can sustain the surge.
Step 5: Test and Optimize
Perform a test brew using freshly ground coffee. Observe the extraction time, crema formation, and steam wand performance. If the machine shuts down or the inverter trips, reduce the load by disabling auxiliary accessories such as cup warmers. Monitor battery voltage with a multimeter; a drop below 11.5 V indicates excessive draw and may shorten battery life. Adjust the inverter’s voltage cutoff settings if available, allowing the system to protect the battery automatically.
Tips & Pro Tips
- Use a dedicated 12 V battery with at least 100 Ah capacity for extended coffee sessions.
- Store coffee beans in an airtight container and grind just before brewing to maximize flavor.
- For the Breville, consider upgrading to a metal portafilter basket to improve durability in mobile environments.
- Periodically clean the converter’s fan and heat sink to maintain efficient cooling.
- When traveling, secure the espresso machine with non‑slip pads to prevent movement during sudden stops.
Troubleshooting
Problem: Inverter trips during steam wand activation.
Solution: Verify that the inverter’s continuous rating exceeds the steam wand’s peak draw. If not, upgrade to a higher‑capacity inverter or limit steaming time.
Problem: Espresso machine does not reach brewing temperature.
Solution: Check battery voltage; a depleted battery will reduce output power. Recharge or replace the battery as needed.
Problem: Excessive noise from the converter.
Solution: Ensure the converter is mounted on a vibration‑isolating pad and that the fan intake is unobstructed.
Conclusion
By assessing power requirements, selecting a suitable inverter, installing a reliable converter, and following safe connection practices, one can enjoy high‑quality espresso while traveling in an RV. The guide provides a clear pathway to integrate a compact espresso machine with an RV power system, ensuring both performance and safety. Implement the tips and troubleshooting steps to maintain consistent coffee quality on every journey.
Products Mentioned in This Guide
Frequently Asked Questions
What wattage does a compact espresso machine typically require?
Most compact machines draw 900‑1100 W, so an inverter rated at least 1200 W is recommended.
How do I size an RV power inverter for an espresso machine?
Calculate the machine’s peak wattage and add a 20‑30% margin; a 1500 W pure‑sine inverter safely handles a 950 W espresso maker.
Can a 12 V lead‑acid battery run an espresso machine without draining quickly?
Only if the battery has high amp‑hour capacity (e.g., 200 Ah) and you limit brewing to short bursts to avoid deep discharge.
What safety precautions should I take when connecting the espresso machine to the inverter?
Use heavy‑gauge cables, a grounded IEC cord, and a circuit breaker to prevent overloads and short circuits.
Is a pure‑sine wave inverter necessary for espresso machines?
Yes, because pure‑sine wave inverters provide clean power that protects the machine’s heating element and pump.